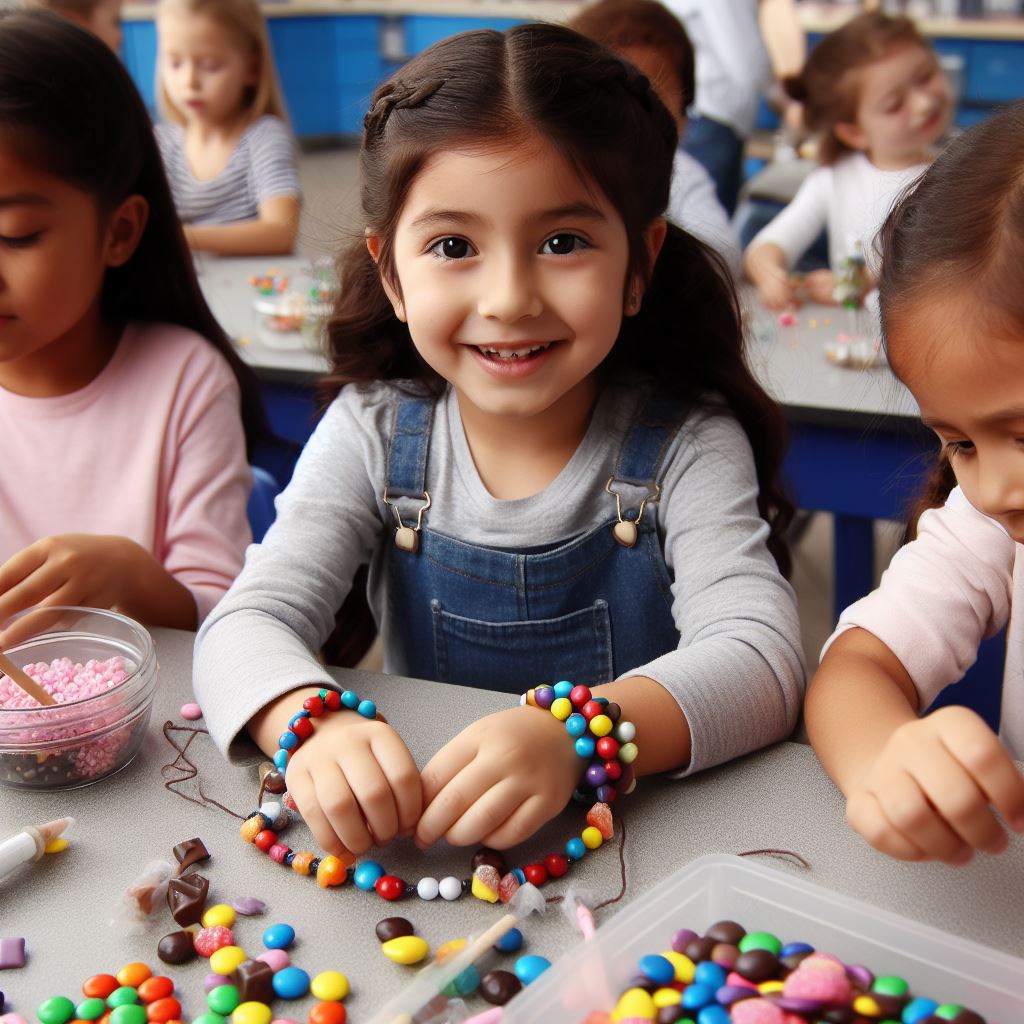
You’re in for a treat! Prepare to dive into a delectable world of colour and creativity. In this article, you’ll discover how to craft candy bracelets that are as fun to make as they are to eat. Get ready to roll up your sleeves, gather a few simple supplies and essential materials, and ignite your imagination. These step-by-step instructions will have you designing custom candy bracelets in no time. Children and adults alike will delight in choosing from a variety of sweets to thread onto elastic bands. Edible jewellery has never been so exciting! Whether you’re looking for an engaging craft activity or wanting to develop fine motor skills in little ones, candy bracelets are a perfect place to start. Sweet success is just around the corner. Let the creativity begin!
Introduction to DIY Candy Jewellery
Getting Started
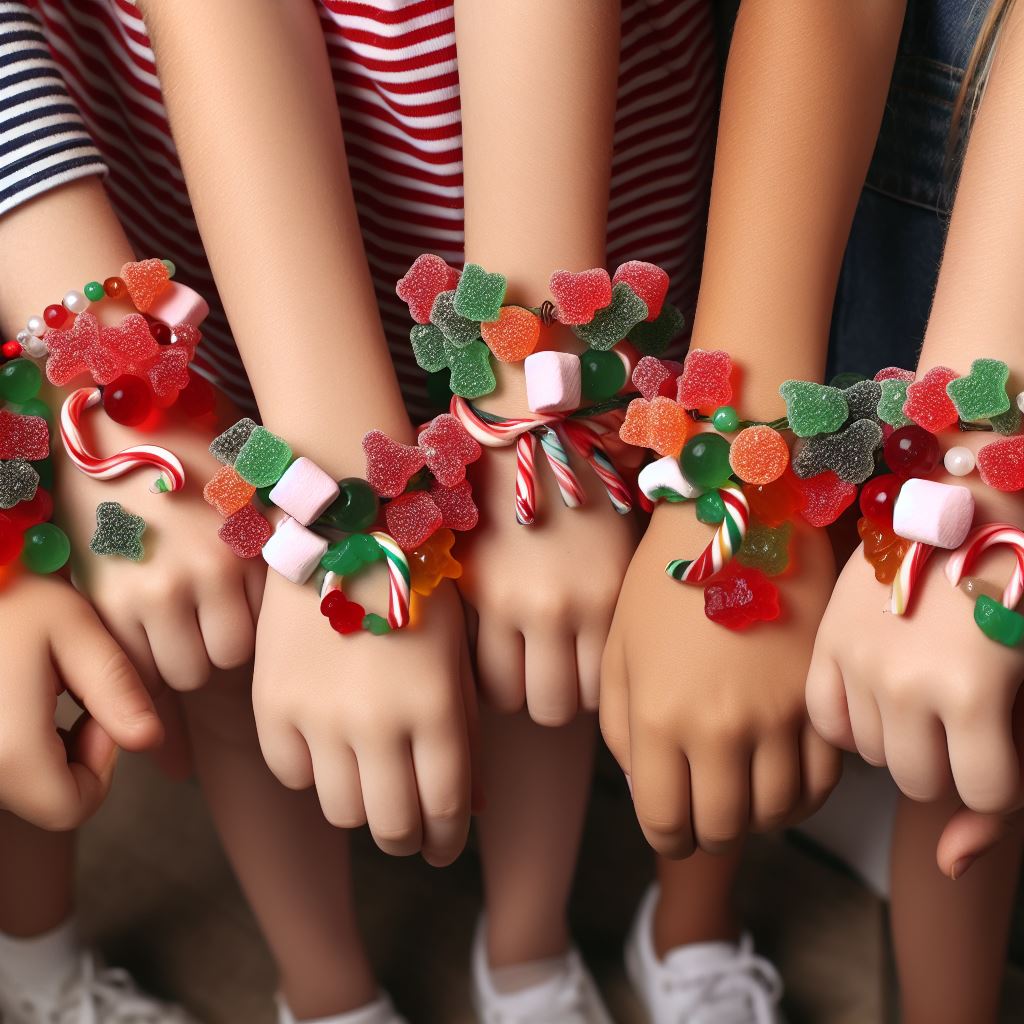
Are you ready to dive into a delightfully sticky craft project with the kids? Candy jewellery is a sweet treat that also doubles as wearable art. With a few basic supplies and your imagination, you’ll be designing colourful candy bracelets in no time.
To begin, gather the necessary equipment: elastic thread or cord, beads, clasps or buckles, and of course, your favourite wrapped candies like M&Ms, Skittles, Reese’s Pieces or gumdrops. You’ll also want scissors, tape and a ruler or measuring tape on hand.
Next, cut the elastic to size for a bracelet that will comfortably fit over the hand. As a guide, 8 to 10 inches is typical for a child’s wrist. Tie off the ends to prevent fraying or attach a clasp for easy wearing and removal.
Now for the fun part – stringing the candies! Place beads, candies and spacers in any pattern you like. Get creative with colour and shape. Leave some slack in the elastic to allow for a little wiggle room. Once complete, tie off the ends and you’ll have an edible fashion accessory ready to enjoy.
Kids will love designing their own candy combination and wearing their sweet creations. Candy jewellery also makes a fun party activity or gift. With simple steps and supplies, you can craft colourful candy bracelets and unleash your inner artist. Get ready to ignite creativity!
Essential Materials Needed for Making Candy Bracelets
To make candy bracelets, you’ll need a few simple supplies. Gather the following:
Materials
- Colourful candy, such as gumdrops, M&Ms, Smarties, Skittles, or small wrapped chocolates. Mix and match for variety!
- Elastic cord or stretchy string in a thickness suitable for threading candy
- Scissors
- Tape (optional)
Once you have your materials, you’re ready to craft your candy creations! With a little patience and creativity, you’ll be sporting sweet jewellery in no time.
Kids will have a blast picking out their favourite treats to thread onto the elastic cord. Let them be as imaginative as they like, combining colours, flavours, sizes and types of candy. The more variety the better! For younger children, consider offering help threading the cord through smaller pieces of candy.
Double-knotting the elastic cord at intervals will prevent all the candy from sliding off one end. You can also secure the ends by tying onto wristbands or taping in place. Make the bracelets loose enough to slide on and off easily, but snug enough to stay put during normal activity and play.
Unleash your inner jewellery designer! Candy bracelets provide an outlet for self-expression and open-ended creation. Once finished, kids will be delighted to enjoy their edible creations. Candy bracelets add whimsical fun to any occasion and make perfect party favours or gifts.
Sweet, simple and fun to make, candy bracelets are a craft project the whole family can enjoy. So gather your supplies, pick your candy and start stringing – your tasty jewellery awaits!
Step-by-Step Directions to Make Your Own Candy Bracelet
It’s time to get creative and make your very own candy bracelet! This fun DIY project is perfect for igniting your imagination. Follow these simple steps and you’ll be sporting a sweet treat in no time.
Gather Your Materials
You’ll need:
- Colourful candy like gummy bears, M&Ms, mini marshmallows, jelly beans
- Flexible string or twine
- Tape
- Scissors
- Beads (optional)
Create Your Pattern
Layout the candies in different patterns on a table to decide how you want them arranged on your bracelet. Get inspiration from photos of other candy bracelets or come up with your own colourful pattern. The options are endless!
Attach the Candies
Tie one end of the string to your wrist to keep it in place. Thread one candy at a time onto the string, securing each in place with a small piece of tape before adding the next one. Make sure not to wrap the tape too tightly around the string so you can still slide the candies around to adjust the spacing.
Add Beads (Optional)
For extra flair, slide beads onto the string between candies. Small gemstones, alphabet beads or brightly coloured wooden beads all work great. Get creative with different bead and candy patterns for a truly unique piece of jewellery.
Tie It Off and Enjoy!
Once you’ve attached all your candies and beads, tie off the loose end of the string to complete your bracelet. Admire your handiwork, then devour or share your candy creation! Your candy bracelet is meant to be enjoyed, so don’t be afraid to eat it. Simply untie the bracelet and re-string new candies for endless crafting fun.
Let your imagination run wild while crafting your candy bracelet. Switch up the candies and beads for new colour combinations and patterns every time. Most importantly, have fun and unleash your creativity!
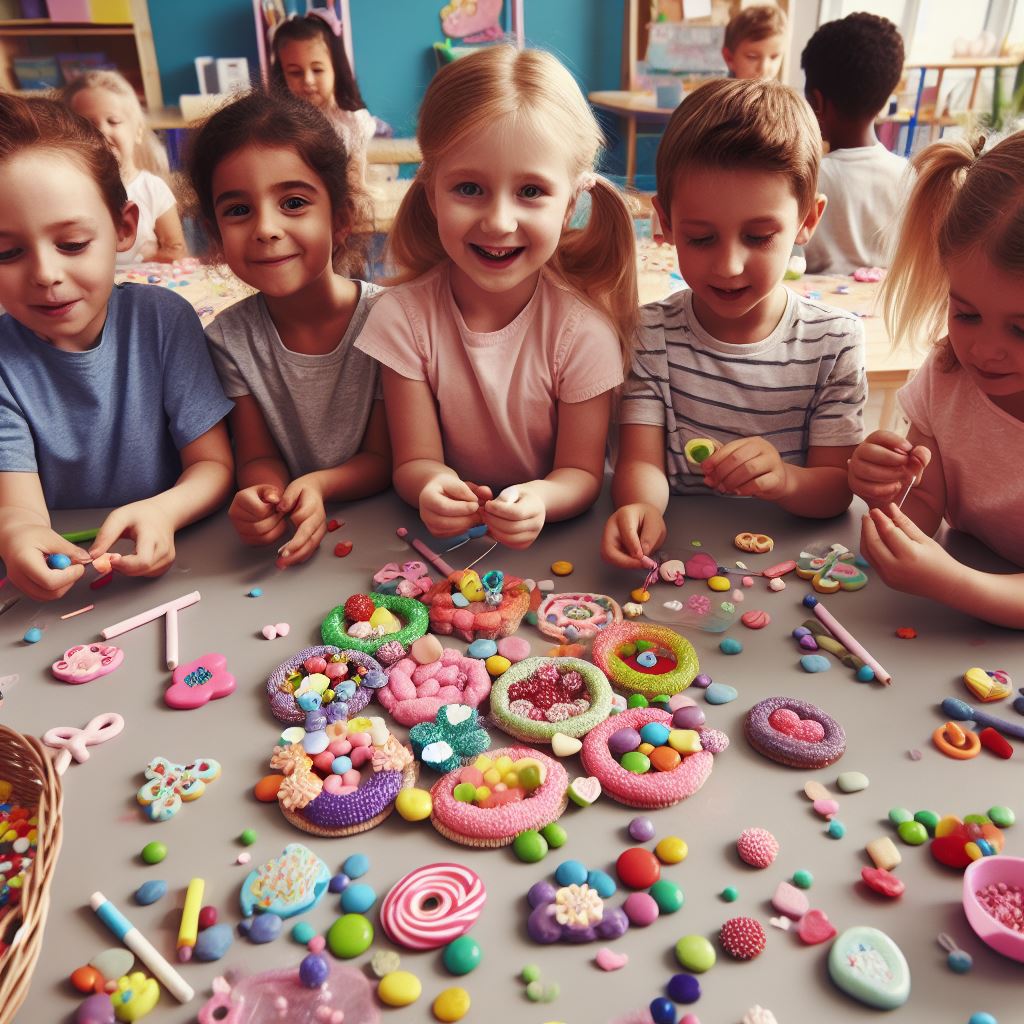
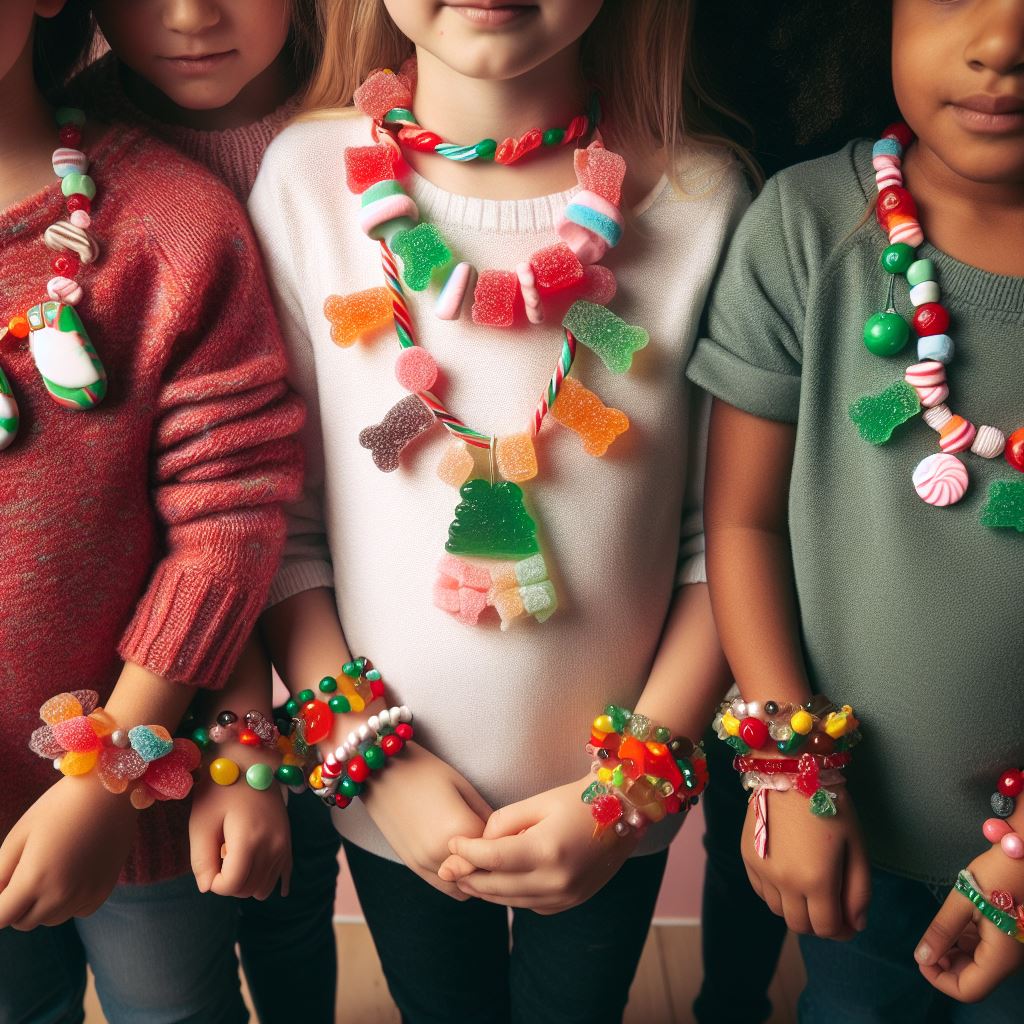
Fun Ideas for Customising Your Candy Jewellery
Once you’ve created your candy bracelets, the fun really begins! Here are some playful ways to customise your sweet treats:
Add charms
Charms are a perfect way to personalise your candy jewellery. Consider cute candy-themed charms like gummy bears, chocolate bars or lollipops. Or choose charms that reflect your hobbies or interests like musical notes, animals or flowers. Attach charms using jump rings before stringing the candy onto the elastic.
Use patterned elastics
Plain elastics work great but for extra pizzazz, try patterned elastics. Stripes, polka dots and zig zags can all add visual interest. You can find patterned elastics at most craft stores.
Paint the candy
Unleash your inner artist! Gently wash and dry the candy, then paint fun designs on them with food-grade paint, nail polish or edible markers once dried. Things like smiley faces, stars, hearts or rainbows are always a hit. Seal the painted candy with a clear glaze or nail polish top coat.
Mix and match candy
There’s no rule that you have to use all one type of candy. Mixing complementary candies, colours and sizes creates a playful, eclectic look. Some combinations to try:
•Red and black licorice wheels with mini M&Ms
•Gummy bears, Swedish fish and mini marshmallows
•Red and green Twizzlers with mini Reese’s Pieces
•Mini lollipops and mini candy canes for a sweet holiday twist!
The possibilities for customising your candy jewellery are endless. Encourage kids to use their imagination and get creative with different candies, add-ons and decorations. Their one-of-a-kind candy bracelets will be bursting with colour, whimsy and delight!
Safety Tips When Making and Wearing Candy Bracelets
Safety is key when making candy bracelets, so follow these tips to ensure a fun and accident-free crafting experience.
Supervise Kids
Always supervise kids closely when making and wearing candy bracelets. Help guide little hands to string beads in the right order and in the proper way. Monitor them as they enjoy their sweet treats to avoid any choking hazards.
Check for Allergies
Double check that none of the participants have any food allergies, especially to common ingredients like corn syrup, sugar, food colouring or gelatin. It’s best to avoid homemade candy bracelets altogether if there are any concerns.
Use Proper Materials
Only use materials specifically intended for candy crafts. Avoid any small or sharp objects that could pose safety risks. Soft, rounded beads, string, tape and glue are ideal.
Set Ground Rules
Lay down some ground rules before getting started to avoid chaos. Only allow kids to eat the candy from their own bracelet. No trading or sharing pieces to minimise germ spreading. Set a maximum number of pieces that can be eaten to avoid tummy aches. And of course, no throwing candy at others!
Super Sweet Fun!
By following a few simple safety tips, you’ll be ready to dive in and have a blast making your tasty candy bracelets. Kids will love being able to craft and enjoy their own sweet jewellery. Get creative with different colours, shapes and patterns for a fun, hands-on activity that also allows for imaginative, open-ended play. Most importantly, enjoy this special time together – the memories will last as long as the candy!
Developing Fine Motor Skills Through Candy Jewellery Crafts
Making candy jewellery is a fun craft that helps build fine motor skills in children. As little hands manipulate small pieces of candy to thread onto string or pipe cleaners, they strengthen finger muscles and hand-eye coordination.
Gathering Supplies
To get started, gather some essential supplies: coloured candy like gummy bears, licorice, taffy or rock candy, string or pipe cleaners, scissors, and tape. Provide a variety of candy in different shapes, sizes, and colours for maximum creativity.
Threading the Candy
Show your child how to pierce the candy with a needle, straw or chopstick and slide it onto the string or pipe cleaner. Let them experiment with different patterns, textures and colour combinations. For younger kids, pre-cut the string or pipe cleaners into bracelet-sized lengths to make it easier to handle.
Creating Clasps
Once their candy creation is complete, help your child attach the ends together to form a bracelet. Use tape, glue dots or melted candy to adhere the ends in a loop. You can also tie the ends in a bow or knot. Show them how to make and attach a simple button clasp for easy on and off.
Wearing with Pride
Now comes the best part – wearing the candy jewellery! Encourage your child to share and swap their creations with friends. Hosting a candy jewellery craft party is a wonderful way for children to express themselves through choosing different candies and coming up with unique designs.
Making candy bracelets and necklaces activates your child’s creativity and fuels imaginative, open-ended play. It provides an engaging multi-sensory experience they’ll want to repeat again and again. Most of all, it gives them an opportunity to take pride in something they made themselves with their own hands.
Creative Uses for DIY Candy Bracelets
Once you’ve created your candy bracelets, the fun doesn’t have to end there! These sweet treats can serve a variety of purposes beyond wearing them. Get creative with how you use them for maximum enjoyment.
Edible Art
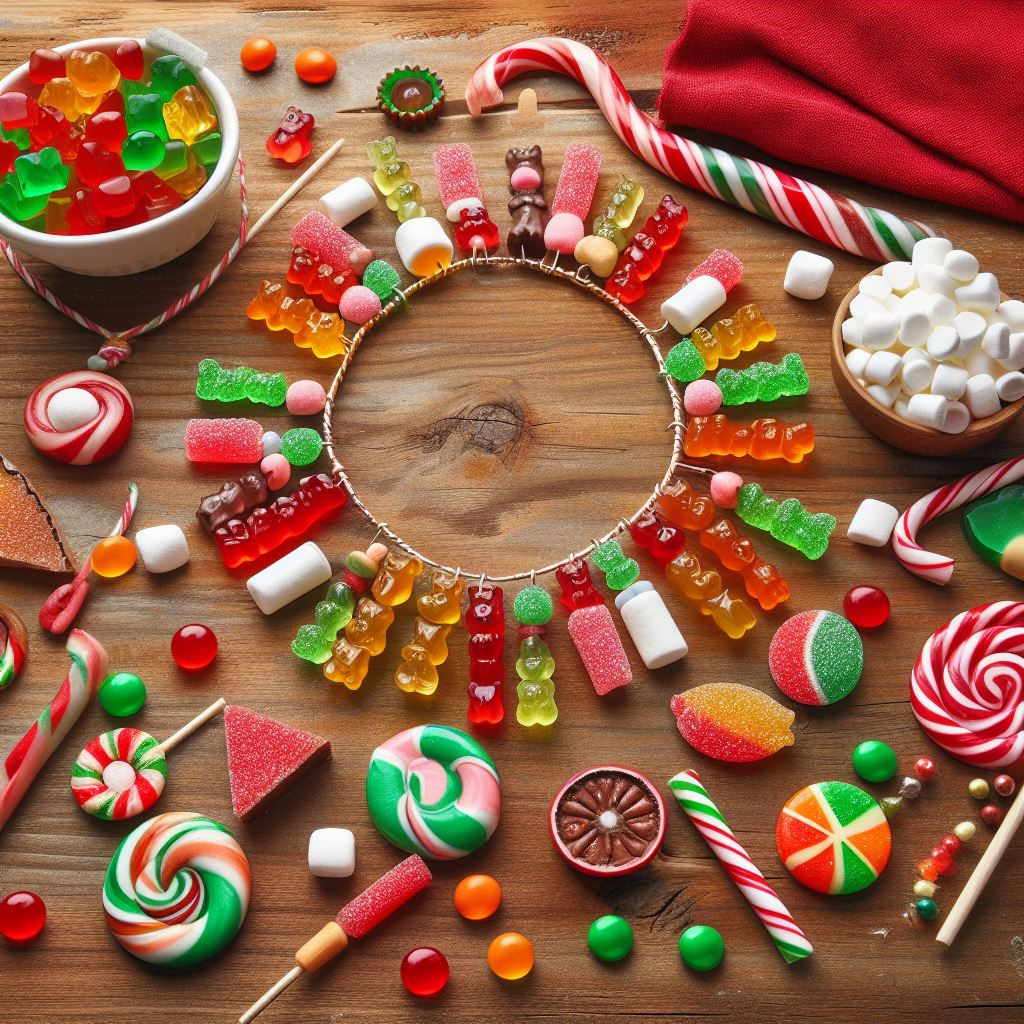
Your candy bracelets are miniature works of art. Display them on a platter for all to admire before devouring them. Arrange them in a circle to form a candy bracelet wreath or garland. Group them by colour or candy type for an eye-catching centrepiece. Their beauty is meant to be appreciated, even if just for a short time!
Tasty Rewards
Use your candy bracelets as rewards or incentives for kids. Give them one to enjoy after completing their chores or homework. Offer them as prizes for games and activities to boost motivation and participation. Their tasty nature makes them ideal for positive reinforcement of good behaviours and jobs well done.
Decorations
Get festive by stringing your candy bracelets together to make garlands, bunting or other decorations. Drape them around doorways, windows or tables. Attach them to gift wrap, cards or treat bags to make any occasion more colourful and whimsical. They are an easy, inexpensive way to add a touch of sweetness to your seasonal decor.
Melted Masterpieces
For an engaging science experiment, have kids melt their candy bracelets to create colourful abstract art. Place bracelets on a baking sheet lined with parchment paper and melt them in a low oven, watching closely. As the candies melt, they will spread and blend together in a vibrant collage of colour and shape. Let cool completely, then display your melted masterpieces!
The possibilities are endless when it comes to finding new uses for your DIY candy bracelets. Unleash your creativity and have fun with these tasty treats. Their versatility and vibrant nature make them ideal for crafts, decorations, rewards and more. Most importantly, enjoy them and delight in their simple sweetness.
Our Experience Making and Enjoying Candy Jewellery
Bracelet making time! Once you’ve gathered all the ingredients and tools, it’s time for the fun part—crafting your candy jewellery. This is where creativity comes alive, as you and the kids imagine and design unique bracelets to your heart’s delight.
To get started, have everyone pick 2-4 of their favourite candy types and colours to use for their bracelet. Things like gummy bears, M&Ms, mini marshmallows, mini Reese’s pieces, mini Twizzlers, and mini Starbursts work great. Next, cut the string or elastic to size for each wrist. About 7 to 8 inches is average for most kids and adults.
Now comes the designing! Place the candies in any pattern you like on the string or elastic. Group similar candies together or mix and match for a colourful collage. Leave some empty space between candies so they have room to move around. Once you have the design set, carefully slide the candies onto the string and tie off the ends to secure them in place.
Your candy jewellery is ready to wear and enjoy! Kids will have a blast wearing their sweet creations and showing them off to family and friends. The bracelets also make perfect gifts for Valentine’s Day or as party favours. Please note the bracelets won’t last forever though, as the candy will eventually melt or crumble off. But not to worry, that just means you get to make a new batch!
Making candy jewellery is a simple craft that sparks creativity in both kids and adults. By following a few easy steps, you’ll be churning out gorgeous candy bracelets in no time. Unleash your imagination and get ready for some delicious fun! These little wearable treats are sure to brighten anyone’s day.
Frequently Asked Questions About Making Candy Bracelets
Making candy bracelets is a fun, hands-on activity for kids that sparks creativity and imagination. Have no fear—with some basic supplies and these helpful tips, you’ll be crafting colourful candy jewellery in no time!
What you’ll need
To get started, gather:
- Candy necklaces or bracelets in various colours
- Ribbon, string, twine or elastic for the band
- Scissors
- Hot glue gun (for adult use only!)
Getting creative
Once you have your materials, the possibilities are endless! Encourage kids to arrange the candy in patterns, shapes or free form. They might try:
- Rainbow order
- Geometric shapes like stars, hearts or triangles
- Their initials or name
- Random, abstract designs
Let them be as inventive as they like! The candy can be glued directly onto the ribbon or string, or onto felt or paper shapes for more dimension.
FAQs
Here are some common questions about making candy jewellery:
• Can I eat the candy? Of course! The candy is perfectly edible, though the bracelets are meant to be decorative. Gently remove any candy pieces before enjoying.
• How long will the candy last? Candy bracelets typically last 1-2 weeks. Keep them in an airtight bag or container in the fridge to maintain freshness.
• Is it safe for young kids? With adult supervision, candy bracelets are safe for kids of all ages. Hot glue and scissors should only be used by adults.
• Can I reuse the supplies? Ribbon, string and felt shapes can be reused for multiple projects. Simply replace the candy pieces when needed.
Making candy bracelets is a creative and engaging craft for kids of all ages. By providing a little guidance and encouragement, you’ll inspire hours of imaginative play and delight in their sweet creations!
OUR EXPERIMENTS MAKING CANDY JEWELRY
Gather Your Materials
To make your candy bracelets, you’ll need:
•Pipe cleaners or string/yarn for the base – We found pipe cleaners easiest for little hands to manipulate.
• Candy pieces – We used gummy bears, gumdrops, mini M&Ms, mini Reese’s Pieces, mini marshmallows, and mini Twizzlers.
•Tape – Masking tape or double-sided tape to adhere the candy to the pipe cleaners.
Shape Your Base
Have the kids bend the pipe cleaners into circles that will fit comfortably around their wrists. Secure the ends together with tape to make solid bangles.
Start Decorating!
This is the fun part – adding the candy! Show the kids how they can thread the candy onto the pipe cleaners to make patterns. They can also stick pieces onto the pipe cleaners with small pieces of tape. Encourage them to be creative with different colour combinations and patterns.
Make it Wearable
Once the kids have covered their pipe cleaner bangles in candy, secure the ends together with tape so they can comfortably wear their new candy jewellery! These sweet creations make amazing gifts for friends or family.
The possibilities are endless with different colour candy and patterns. These candy bracelets ignite creativity and make for an engaging craft project for kids and adults alike. Your wrists have never looked so good – or tasted so sweet! Making your own candy jewellery is a fun activity for birthday parties, playdates or just a rainy day.