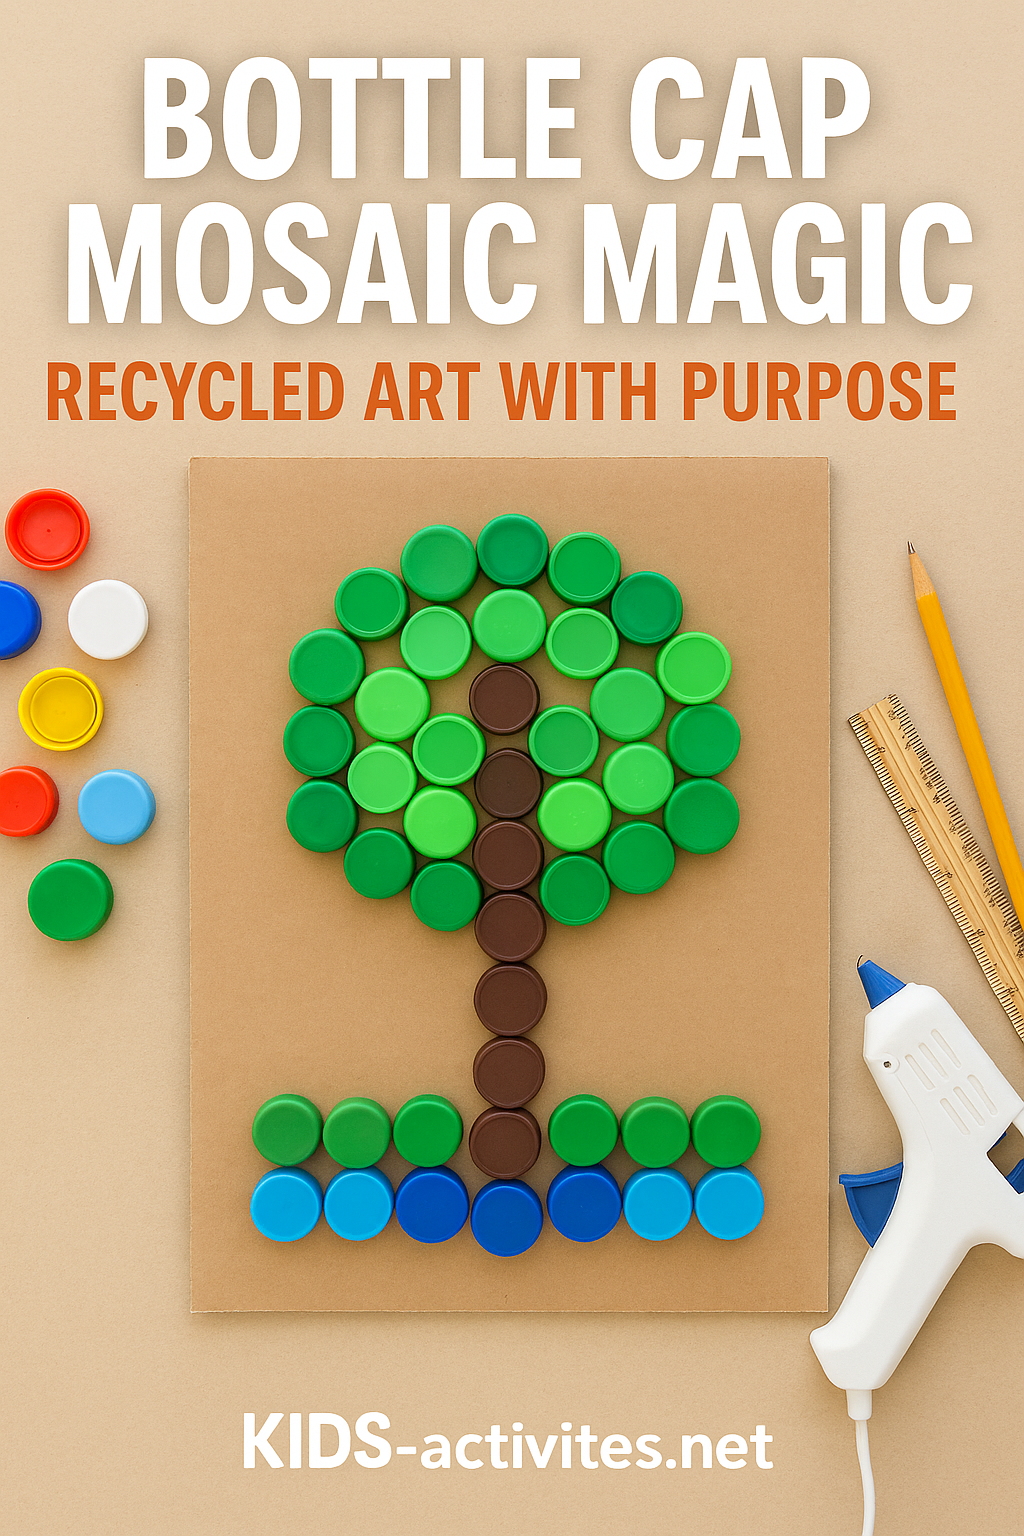
Bottle Cap Mosaic Magic: Recycled Art with Purpose
Why Kids Need More Than Just Glue & Glitter
Let’s be honest—most kids’ crafts are fun, but fleeting. They’re colourful, quick to make, and… often tossed in the bin. Parents and educators are constantly searching for craft projects that are not only creative but meaningful, budget-friendly, and environmentally responsible.
That’s where Bottle Cap Mosaic Magic comes in. This project tackles multiple concerns in one swoop:
- Too much plastic waste at home?
- Looking for sustainable art activities?
- Want to teach kids design thinking and reuse principles?
This activity doesn’t just entertain—it educates, empowers, and beautifies.
The Framework: Art Meets Sustainability
At its heart, this is more than a craft—it’s a tangible lesson in:
- Recycling & Sustainability: Kids see how common waste can be repurposed.
- Colour Theory: Sorting caps by hue and shade fosters artistic planning.
- Math & Spatial Reasoning: Patterns and layout reinforce early geometry.
- Fine Motor Skills: Handling and placing small caps develops precision.
You’re not just making a mosaic—you’re training a mindful mini-maker.
Materials You’ll Need
| Item | Purpose |
|---|---|
| 80–150 plastic bottle caps | The core mosaic materials |
| Strong cardboard or MDF board (A3 or larger) | Base canvas |
| Pencil + eraser | For sketching the design |
| Craft glue or hot glue gun | To adhere caps securely |
| Ruler | For grid layout and alignment |
| Clear acrylic spray (optional) | Sealing and finishing |
| Old magazines or paper (optional) | For extra texture backgrounds |
Step-by-Step Instructions
Step 1: Sort the Caps
Encourage children to gather bottle caps from home, friends, or the community. Sort them into colour families:
- Primary (red, blue, yellow)
- Cool tones (green, blue, violet)
- Warm tones (red, orange, yellow)
- Neutrals (black, white, grey)
Let younger kids help with sorting—it’s great for visual recognition!
Step 2: Sketch the Design
On the board, draw a basic outline of the desired shape. Start with:
- Rainbow
- Tree
- Earth/planet
- Butterfly
- Sun & waves
Use a ruler for symmetry or try freehand for creativity. Keep it large enough to fit multiple caps.
Step 3: Plan Colour Blocks
Decide which cap colours will go in which zones. You can:
- Draw a grid and colour it in first
- Lay out caps loosely on the board before gluing
This teaches planning before execution—a great transferable skill.
Step 4: Glue Them Down
Using craft glue (or hot glue with adult help), start from the bottom row and work upward.
Tips:
- Press each cap firmly and hold for 5 seconds
- Space caps closely to reduce gaps
- Use glue in the centre of the cap
Let dry completely before lifting the board.
Step 5: Add Optional Finishes
- Add a frame made from scrap wood or thick cardboard.
- Use markers to write your name and date on the back.
- Spray lightly with clear sealant for gloss and protection.
Educational Add-Ons for Deeper Learning
| Concept | Activity |
|---|---|
| Math | Calculate number of caps used per colour. Estimate total surface area covered. |
| Geography | Make a world map mosaic using caps from international beverages. |
| Science | Research plastic types and biodegradability. |
| Art | Study famous mosaics like those in Pompeii or Gaudí’s Park Güell in Spain. |
Fast Variant for Classrooms
Time-limited? Try this:
- Use mini canvases (A5 size) for quick 20-min builds.
- Pre-sort caps by colour for each group.
- Offer a fixed theme (e.g. “Nature Shapes”).
Kids can display all their canvases together for a giant composite artwork.
Who’s This For?
- Ages: 6–12
- Ideal settings: schools, eco-clubs, homeschooling, community art days
- Great tie-in for: Earth Day, Plastic-Free July, Recycling Week
What Parents and Teachers Say
“I never realised how much plastic we were throwing away until this project. My daughter became a recycling warrior overnight!” – Emily, NSW
“Our Year 3 class used this activity for their sustainability project. The results were so colourful we turned them into a gallery!” – Mr. Grant, Victoria
Link This Activity With:
- Cardboard City Builders – Turn boxes into eco-architecture
- Plastic Bottle Rockets – Science + reuse = fun
- Recycled Paper Bead Bracelets – Craft meets jewellery
- Nature-Inspired Art Projects
FAQs (For Featured Snippet Boost)
Q: What is a bottle cap mosaic?
A: It’s a type of recycled art where children create designs by gluing plastic bottle caps onto a surface, forming colourful images or patterns.
Q: What glue works best for bottle caps?
A: Hot glue (with supervision) or strong craft glue is ideal. Avoid regular school glue as it may not hold.
Q: How many bottle caps do I need?
A: For an A3-sized board, you’ll need approximately 80–150 caps depending on spacing.
Q: Can this activity be done in a classroom?
A: Absolutely! It’s ideal for group work and can be scaled for classroom display.
Final Thoughts: More Than a Pretty Picture
In a world full of throwaway art projects, Bottle Cap Mosaic Magic teaches children that creativity can have a conscience. By crafting with intention, kids learn to see waste as opportunity—and their role as young makers of change.
Ready to glue, plan, and inspire? This isn’t just craft time. It’s a creative revolution—one cap at a time.


