Pop-Up Overpass Craft: Build a Busy City in 3D
Why It’s a Hit: Kids + Cars + Paper Magic = Win
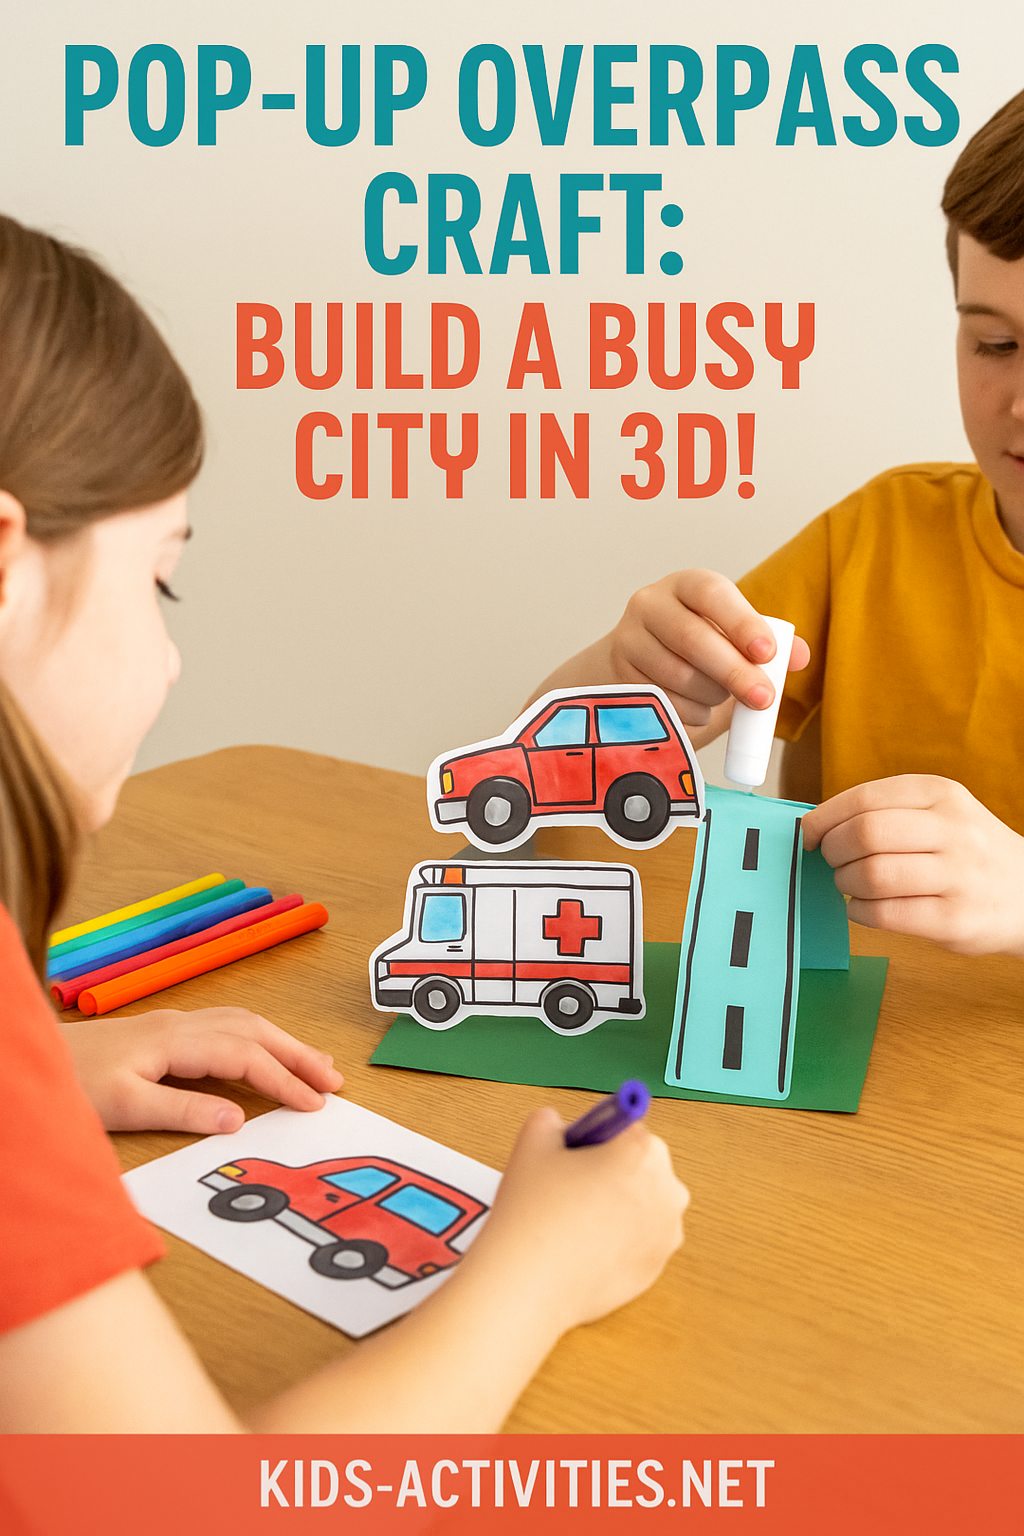
Let’s be honest—there’s just something universally exciting about cars zooming over bridges! For many preschoolers and early primary kids, vehicles are more than toys—they’re full-on fascinations. This pop-up overpass craft taps into that obsession in the best way: by letting kids build and color their own 3D city, complete with roads, tunnels, bridges, and their favorite vehicles.
This activity is a top pick because it combines four magical ingredients:
- Bright colors
- Movement and mechanics
- Storytelling potential
- Low-cost, low-mess setup
It sparks creativity, builds basic STEM understanding, and supports pretend play long after the glue dries. Ideal for classrooms, homeschool setups, or rainy-day projects.
What They Learn (While Having Loads of Fun)
This craft isn’t just cute—it’s a stealth learning tool. Children engage in:
- Fine Motor Development: Tracing, cutting, folding, and assembling tiny cars
- Spatial Awareness: Understanding how layers, roads, and bridges function
- Engineering Concepts: Using folds and supports to create height and tension
- Color Theory: Choosing contrasting combinations for signs, cars, and background
- Pretend Play: Constructing stories like “fire truck to the rescue” or “car jam at the overpass”
- Literacy Links: Writing signs, labeling car models, and naming neighborhoods
Plus, building a bridge introduces early architectural thinking—an excellent primer to later STEM topics like load-bearing and balance.
What You’ll Need
Basic supplies:
- Colored cardstock or thick construction paper
- Scissors (safety scissors for younger kids)
- Glue stick, liquid glue, or double-sided tape
- Markers, crayons, or colored pencils
- Ruler (to fold clean lines)
- Optional: small toy cars for play afterward
Included in our PDF kit:
- Printable car templates (ambulance, fire truck, car, bus)
- Roadway and intersection strips
- Signs (STOP, Yield, traffic lights, etc.)
- Award certificates for creative builders
Step-by-Step Instructions
Step 1: Build the Bridge Base
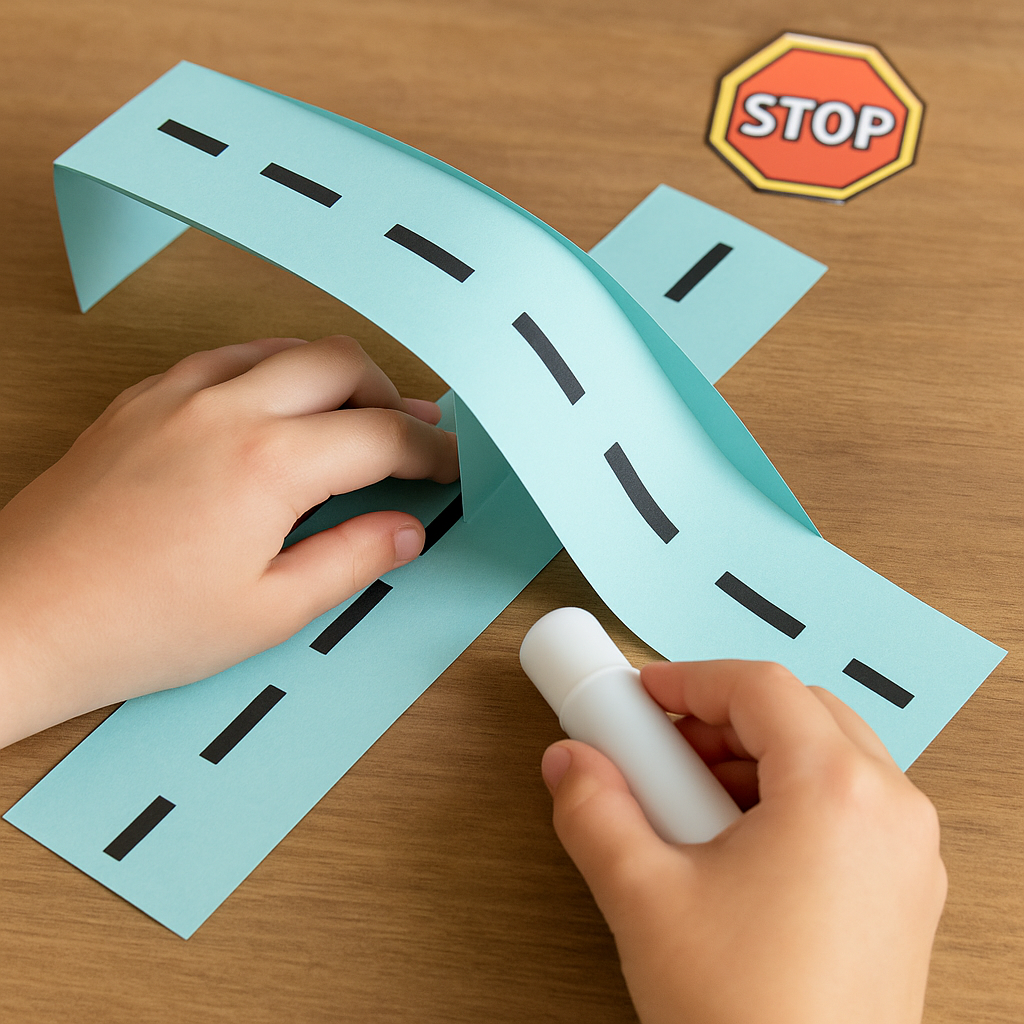
- Cut a long strip of cardstock for the overpass.
- Fold both ends down at 90° angles to form supports.
- Tape or glue the ends to a background base, leaving a space beneath.
- For extra support, double-layer the strip or add folded braces.
Tip: Add a slope ramp leading to the bridge for extra dimension!

Step 2: Add Roads, Markings, and Intersections
- Use black strips for roads and white strips for lane dividers.
- Include curved roads, roundabouts, or X-crossings for complexity.
- Encourage creativity: add a parking lot, school zone, or even a paper gas station.
Step 3: Design and Construct Vehicles
- Have kids draw or trace vehicle templates from the PDF.
- Cut them out, color them in, and fold the bases to stand.
- For movement, attach a paper tab at the back and slide on the road.
Step 4: Accessorise the City
- Cut out and label traffic lights, signs, tunnels, bushes, streetlamps.
- Create “buildings” by folding cardstock boxes and labeling them (e.g., “Fire Station”, “Bakery”).
- For sensory fun, use textured paper or felt to mimic grass, asphalt, or water.
Step 5: Combine, Play, and Display
- Let kids arrange and re-arrange elements into new layouts.
- Tell stories: who’s going where? What’s the traffic report?
- Leave it set up on a table for open-ended play across days.
Quick Variant for Busy Days
Use our downloadable Print-Cut-Play PDF Kit:
- All roads, signs, and vehicles are pre-designed
- Kids simply color, cut, and glue into place
- Saves time and ensures consistent shapes (ideal for group activities)
Add magnets or Velcro dots to allow swapping scenes for ongoing play.
Teaching Tips & Creative Extensions
STEM + Art Combo:
- Introduce concepts like support beams, gravity, and symmetry.
- Compare real bridges and overpasses with photos or field trips.
Language Development:
- Label cars, signs, and buildings in English or second languages.
- Let kids narrate a “city news update” describing what’s happening in the scene.
Math Integration:
- Measure bridge height, road length, and car width.
- Use grids to plan city layouts (great for 6–8-year-olds).
Group or Family Play:
- Make a “city zone” where each child contributes one building or feature.
- Host a paper car race day with ramps and obstacles.
Related Activities You May Like
- Marble Maze Challenge: Build YSpinning Science: How to Make Tornado Tubes – Kids Activitiesour Own Cardboard Labyrinth
- Spinning Science: How to Make Tornado Tubes
- Seashell Necklace DIY for Kids
Free Download: Pop-Up City Maker Kit
Looking for printable templates, paper vehicles, and traffic signs? Access our full kit here: Download the Pop-Up City Activity Pack
For more STEM-inspired creative play kits, check out our Free Resources Library. 📥 [Click here to get the PDF templates + award sheets + city planning printables]
Share your custom paper city with us on social using #KidsActivitiesNet or tag us at kids-activities.net!


