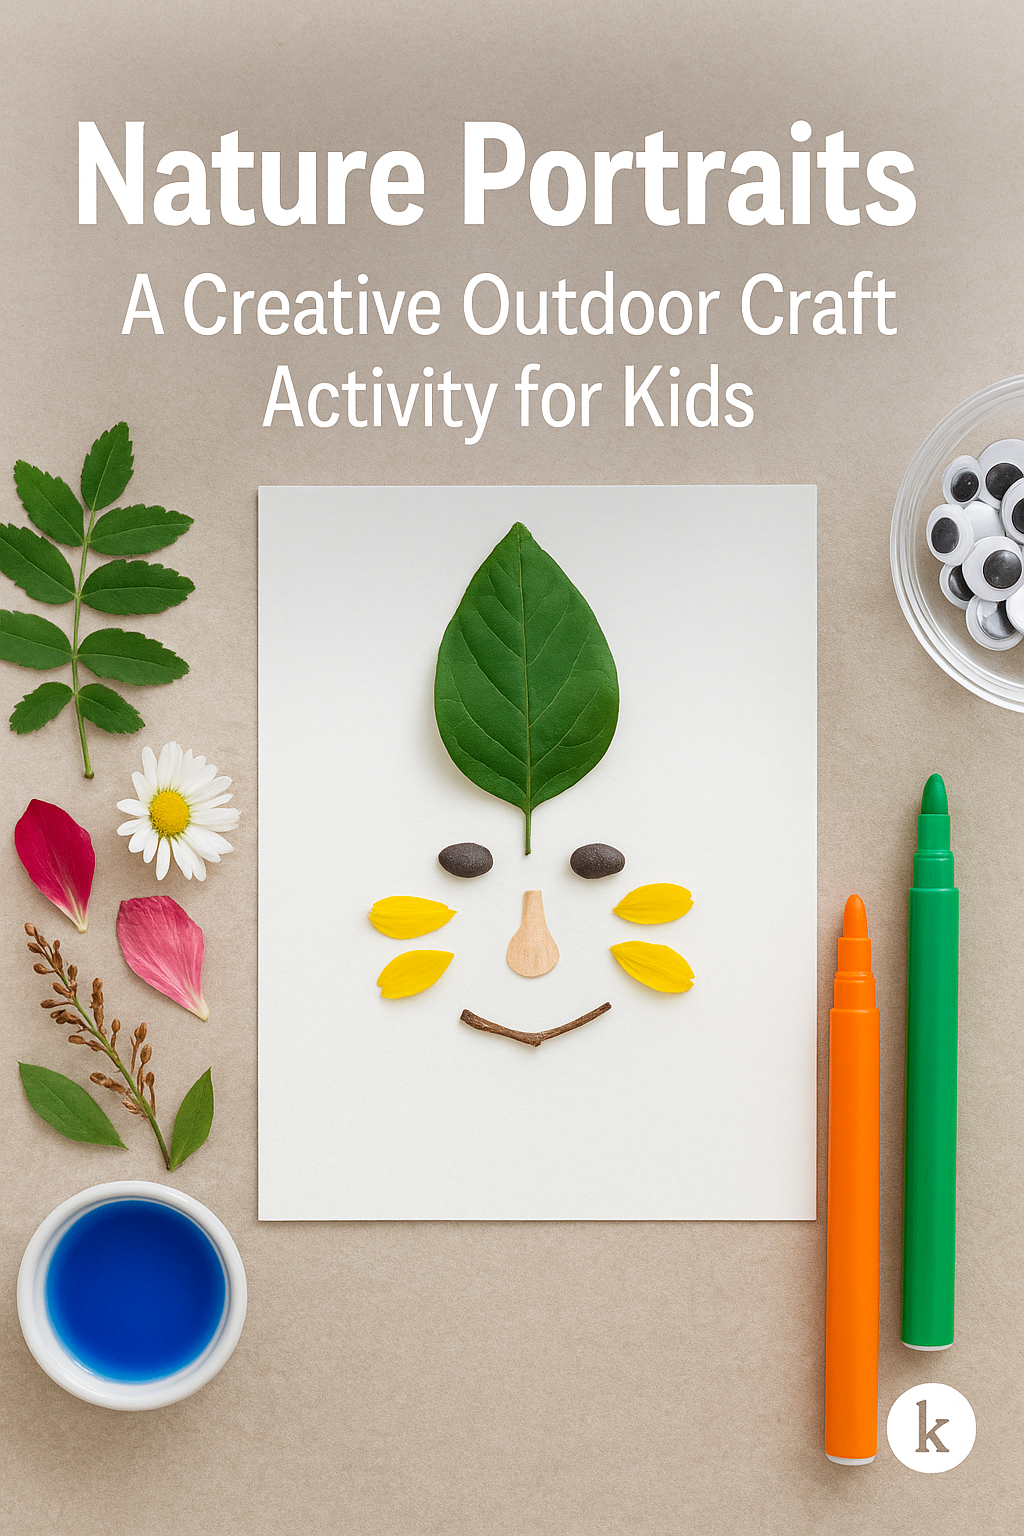
Where Nature Meets Imagination
Are you looking for a kids’ activity that combines outdoor exploration, creativity, and screen-free fun? Meet the magical world of Nature Portraits! In this craft, children gather materials from nature—leaves, petals, twigs, seeds—and use them to create imaginative portraits of themselves, animals, or even mythical creatures.
Nature Portraits are ideal for ages 3–10 and adaptable for a wide range of learning settings, from homeschooling to classrooms to backyard playdates. This blog will guide you through everything you need to know: how to gather materials, ways to structure the activity, learning outcomes, and creative variations that will keep kids engaged and inspired.
Why Nature Crafts Are Powerful for Kids
Crafting with natural elements isn’t just fun—it’s deeply educational. Here’s why this activity is so impactful:
- Encourages observation skills: Kids learn to notice texture, shape, and color differences in natural objects.
- Fuels creativity: With no two leaves alike, the possibilities are endless.
- Promotes mindfulness: Nature crafting calms the mind and focuses attention.
- Teaches sustainability: Children begin to appreciate and respect natural resources.
Nature Portraits are the perfect way to introduce these concepts through open-ended play.
What You’ll Need (Materials Checklist)
One of the best parts of this project? Most materials come from your own backyard!
- A variety of collected natural materials:
- Leaves (different shapes and sizes)
- Petals and flowers
- Twigs and bark
- Seeds or small pebbles
- Thick paper or cardboard (for a sturdy base)
- Glue stick or white craft glue
- Optional:
- Googly eyes
- Markers or crayons
- Scissors
- Recycled paper scraps
Pro tip: Bring a reusable bag or basket on your nature walk so kids can collect materials mindfully and respectfully.
How to Make Nature Portraits: Step-by-Step
- Go on a Nature Walk
Head outside to a park, backyard, or garden. Ask kids to gather at least 5–10 different natural items. Focus on variety! - Sort the Materials
Back at home or in the classroom, lay out everything and sort by color, texture, or type. This also helps with fine motor skill development. - Visualize the Portrait
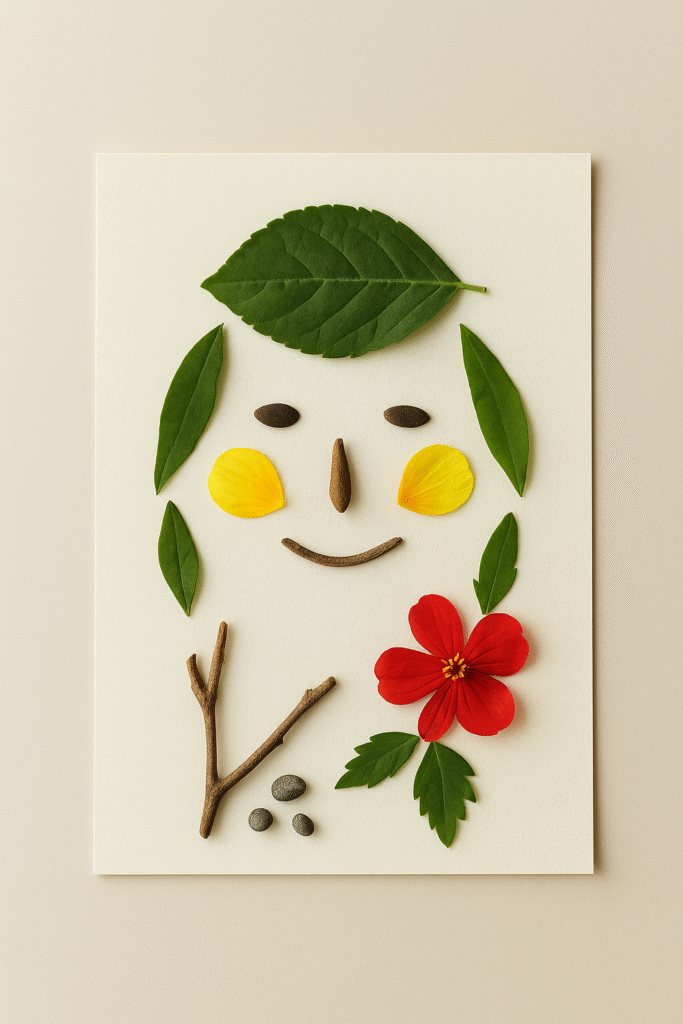
Encourage your child to imagine what they’d like to create: a self-portrait, an animal face, a forest fairy? Use leaves as hair, petals as cheeks, twigs for a smile! - Assemble the Design
Before gluing, have kids place their items on the paper to test the layout. Play around with arrangement. - Glue It Down
Once the layout is ready, begin gluing each piece. Use a glue stick for lightweight items and white glue for heavier ones like bark. - Add Details (Optional)
Add googly eyes, draw facial features with markers, or add a background scene.
Educational Benefits of Nature Portraits
This craft goes far beyond art. Here are some core learning outcomes:
- Science connection: Discuss plant parts and identify species.
- Math skills: Practice sorting and symmetry.
- Language development: Encourage storytelling about the characters they’ve created.
- Fine motor development: Picking and placing small items improves dexterity.
Whether at school or at home, this activity offers rich cross-curricular value.
Creative Variations to Try
Want to keep the idea fresh? Try one of these nature portrait twists:
- Seasonal Portraits: Use materials that reflect the season—orange leaves in fall, blossoms in spring.
- Family of Faces: Have kids make an entire “leaf family” and tell stories about each one.
- Fantasy Creatures: Unicorns, dragons, or forest sprites made with sticks and petals? Yes please!
- Collaborative Mural: Create a class or family-sized nature collage using a large sheet of cardboard.
These variations build on the same foundation of open-ended, imaginative expression.
Display and Celebrate the Art
Once the portraits are complete, proudly display them!
- Hang them with clothespins on a string.
- Create a nature art gallery wall.
- Snap photos and turn them into a digital slideshow.
- Laminate favorites for long-lasting keepsakes.
You can even pair this with a mini-exhibit where kids present their characters and explain their creative choices.
Tips for Educators & Parents
- Discuss safety: Avoid poisonous plants or sharp materials.
- Model mindful collecting: Only take what’s already fallen or abundant.
- Use descriptive language: Encourage kids to talk about textures and shapes.
- Connect with books: Pair the activity with nature-themed picture books.
Art That Grows From the Ground Up
Nature Portraits are a beautiful, eco-conscious way to foster creativity, connection to the outdoors, and learning through play. With just a few simple supplies—and a lot of imagination—your child can transform nature’s “leftovers” into museum-worthy masterpieces.
Next time you take a walk, remember: you’re not just gathering leaves, you’re gathering ideas. Happy crafting!