Why This Activity Grabs Kids’ Attention
In a world dominated by digital entertainment, children need more hands-on experiences that engage their brains and bodies. That’s where the Marble Maze Challenge comes in. This low-prep, high-engagement activity lets kids create their own moving puzzle using just cardboard and straws—a fun fusion of engineering, design, and play.
Many children enjoy puzzles and obstacle courses, but few realise they’re actually practicing real-world skills like spatial reasoning, trial-and-error thinking, and creative problem-solving. Instead of passively consuming content on a screen, kids build something real—then test and refine it, all while having fun.
Learning Goals: The Science & Logic Behind the Fun
This activity is grounded in STEM and maker learning principles, specifically:
- Engineering: Constructing walls and pathways using straws and cardboard builds mechanical thinking.
- Mathematics: Concepts of distance, angle, and balance are introduced informally through design.
- Physics: Kids naturally learn how slope, friction, and gravity affect marble movement.
- Design & Art: Personalising the maze with themes or patterns nurtures visual creativity.
- Resilience: Iterating the design helps build perseverance and problem-solving stamina.
According to educational research, spatial awareness tasks in early childhood correlate with long-term success in mathematics and science. This maze isn’t just playtime—it’s brain-building.
Materials List
These materials are easy to find at home or school:
- Shoebox lid or cardboard base (A4 to A3 size)
- Drinking straws (paper or plastic), cut into 4–8 cm segments
- Craft glue or hot glue gun (adult supervision recommended)
- Scissors
- Pencil and ruler
- 1 small marble or bead
- Optional: washi tape, markers, themed stickers, paint for decoration
Step-by-Step Instructions
Step 1: Sketch Your Maze Layout
Use pencil and ruler to sketch your maze plan on the cardboard. Clearly mark the start and finish. Encourage kids to include:
- Straight paths
- Sharp corners
- Dead ends
- Optional ramps or tunnels for older children
Tip: Suggest a theme (e.g., Space Mission, Jungle Escape, Candy Kingdom) to spark imagination.
Step 2: Cut and Organise the Walls
Cut straws into equal or varied lengths. Organise them by type:
- Short straight paths
- Long walls for borders
- Corner connectors
You can pre-sort these into cups to help younger children select pieces easily.
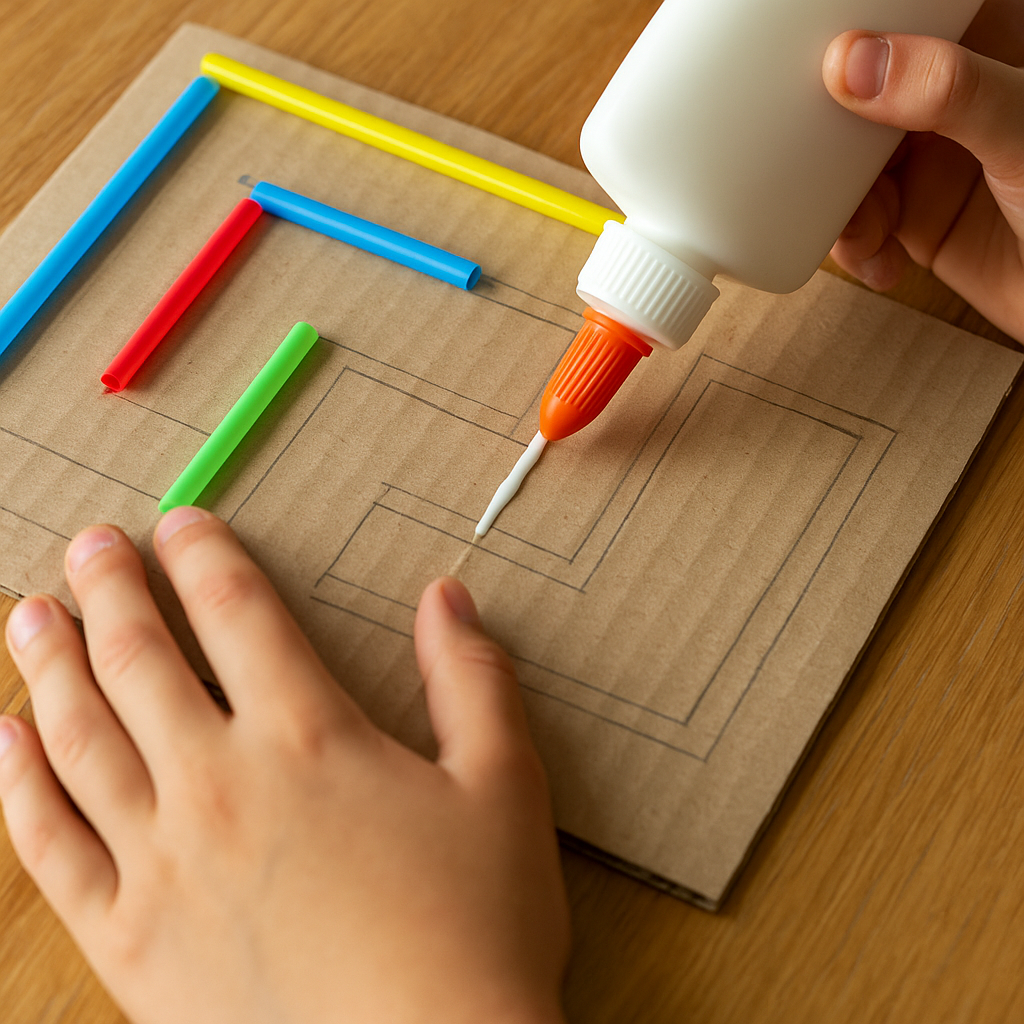
Step 3: Glue the Maze Structure
One by one, glue the straws onto the maze outline. Press gently and hold for 5–10 seconds for adhesion.
- Make sure walls are tall enough to guide the marble
- Double-check spacing: the marble should roll smoothly
Step 4: Add Height and Challenges
To make things more exciting:
- Fold cardboard strips into bridges or ramps
- Use foam pieces or bottle caps as tunnels or blockers
This is ideal for children 8+ who want an extra challenge.
Step 5: Personalise the Maze
Let kids decorate:
- Add stickers matching the maze theme
- Use coloured tape or paint
- Create character obstacles (e.g., monsters, traffic signs, treasure chests)
Step 6: Test and Iterate
Drop the marble at the start and try to reach the goal. If it gets stuck or finishes too fast:
- Adjust spacing
- Add bumpers or angles
- Make new maze paths on fresh cardboard for variety
Quick Variant (10-Minute Setup)
Flat Maze Blow Game:
- Draw a top-down maze on a flat sheet of paper
- Use a straw to blow the marble through the path
This version helps children practice breath control and focus.
Add-On Classroom Extensions
- Math Link: Measure the distance the marble travels; convert to cm or inches.
- Literacy Link: Have students write a story about their maze’s theme (e.g., “Escape the Haunted Forest!”)
- Peer Testing: Let classmates test each other’s designs and provide feedback
- Stopwatch Challenge: Record how long it takes to complete the maze; graph results
FAQs: What Parents & Teachers Ask Most
Q: Can we use something instead of straws?
A: Yes! Try popsicle sticks, pipe cleaners, foam strips, or even LEGO walls.
Q: What age is this best suited for?
A: Ages 6–10. Younger kids may need more help with cutting and gluing.
Q: What if I don’t have a marble?
A: Use a bead, small bouncy ball, or even rolled foil. Just test its size before building.
Q: Can this be done with a group?
A: Absolutely. It’s a great STEM station for classrooms, libraries, or after-school clubs.
Q: Is this messy?
A: Only mildly. Provide mats or trays under the work area, especially when using glue.
Internal Links for Exploration
Final Thoughts: Why This One Sticks
Cardboard marble mazes hit the sweet spot between creativity and logic. They keep kids focused, teach foundational skills, and offer open-ended play long after the glue dries. Whether at home or in a learning space, this challenge turns everyday materials into big learning moments.
Let the marbles roll!